centos7+python3.7+xadmin+uwsgi+nginx+django项目部署
首先把项目里面的包名和版本放到requirements.txt文件里
pip freeze >requirements.txt
1、更新系统的依赖
yum update -y
yum -y groupinstall "Development tools"
yum install openssl-devel bzip2-devel expat-devel gdbm-devel readline-devel sqlite-devel psmisc libffi-devel gcc mariadb-devel
2、安装python3.7并建立虚拟连接
cd /usr/local
wget https://www.python.org/ftp/python/3.7.0/Python-3.7.0.tgz
tar -zxvf Python-3.7.0.tgz
cd Python-3.7.0
./configure --prefix=/usr/local/python3
make && make install
ln -s /usr/local/python3/bin/python3.7 /usr/bin/python3
ln -s /usr/local/python3/bin/pip3.7 /usr/bin/pip3
3、安装虚拟环境 (本人习惯一个项目一个虚拟环境)
pip3 install virtualenv
ln -s /usr/local/python3/bin/virtualenv /usr/bin/virtualenv
mkdir -p /data/env
mkdir -p /data/web
cd /data/env
virtualenv --python=/usr/bin/python3 website
4、安装外层uwsgi并建立软连接
pip3 install uwsgi
ln -s /usr/local/python3/bin/uwsgi /usr/bin/uwsgi
5、启动虚拟环境并将项目搬入
cd /data/env/website/bin
source activate

# 将项目搬入到 /data/web/ 下面
6、在虚拟环境中再次安装uwsgi
(website) [root@iZbp1i4wx78lgoakh2orx6Z /]# pip3 install uwsgi
7、安装项目所需的依赖
(website) [root@iZbp1i4wx78lgoakh2orx6Z /]# pip3 install -r /data/web/hnmall/request.txt
8、 安装MySQL 并修改密码和设置
yum -y install https://dev.mysql.com/get/mysql57-community-release-el7-11.noarch.rpm
yum install -y mysql-server
systemctl start mysqld
systemctl enable mysqld
cat /var/log/mysqld.log |grep 'A temporary password'
mysql -u 'root' -p
alter user 'root'@'localhost' identified by 'Password123456./';
use mysql;
update user set host = '%' where user = 'root' and host='localhost';

# 为项目创建数据库
create database hnmall character set utf8 collate utf8_general_ci;
问题一:
从 file:///etc/pki/rpm-gpg/RPM-GPG-KEY-mysql 检索密钥 源 "MySQL 5.7 Community Server" 的 GPG 密钥已安装,但是不适用于此软件包。请检查源的公钥 URL 是否配置正确。 失败的软件包是:mysql-community-server-5.7.37-1.el7.x86_64 GPG 密钥配置为:file:///etc/pki/rpm-gpg/RPM-GPG-KEY-mysql
解决方法:
rpm --import https://repo.mysql.com/RPM-GPG-KEY-mysql-2022
9、设置uwsgi
(website) [root@iZbp1i4wx78lgoakh2orx6Z hnmall]# cd /data/web/hnmall

(website) [root@iZbp1i4wx78lgoakh2orx6Z hnmall]# cat website.xml
<uwsgi>
    <socket>/data/web/hnmall.sock</socket>
    <http>0.0.0.0:8000</http>
    <chdir>/data/web/hnmall</chdir>
    <module>hnmall.wsgi</module>
    <threads>2</threads>
    <master>true</master>
    <processes>4</processes>
    <daemonize>/data/web/uwsgi.log</daemonize>
    <pidfile>/data/web/uwsgi.pid</pidfile>
</uwsgi>
10、安装 nginx
cd /home/
wget http://nginx.org/download/nginx-1.15.0.tar.gz
tar -zxvf nginx-1.15.0.tar.gz
cd nginx-1.15.0
./configure
make && make install
11、配置http(即配置Nginx.conf文件)
(website) [root@iZbp1i4wx78lgoakh2orx6Z conf]# cd /usr/local/nginx/conf

# ① 创建一个uwsgi.conf文件,写入以下内容
(website) [root@iZbp1i4wx78lgoakh2orx6Z conf]# cat uwsgi.conf
uwsgi_param  QUERY_STRING       $query_string;
uwsgi_param  REQUEST_METHOD     $request_method;
uwsgi_param  CONTENT_TYPE       $content_type;
uwsgi_param  CONTENT_LENGTH     $content_length;

uwsgi_param  REQUEST_URI        $request_uri;
uwsgi_param  PATH_INFO          $document_uri;
uwsgi_param  DOCUMENT_ROOT      $document_root;
uwsgi_param  SERVER_PROTOCOL    $server_protocol;
uwsgi_param  REQUEST_SCHEME     $scheme;
uwsgi_param  HTTPS              $https if_not_empty;

uwsgi_param  REMOTE_ADDR        $remote_addr;
uwsgi_param  REMOTE_PORT        $remote_port;
uwsgi_param  SERVER_PORT        $server_port;
uwsgi_param  SERVER_NAME        $server_name;


# ② 修改配置文件前记得备份
(website) [root@iZbp1i4wx78lgoakh2orx6Z conf]# cat nginx.conf
events {
    worker_connections  1024;
}
http {
   log_format  main  '$remote_addr - $remote_user [$time_local] "$request" '
                      '$status $body_bytes_sent "$http_referer" '
                      '"$http_user_agent" "$http_x_forwarded_for"';

    access_log  /var/log/nginx/access.log  main;

    sendfile            on;
    tcp_nopush          on;
    tcp_nodelay         on;
    keepalive_timeout   65;
    types_hash_max_size 2048;

    include             /usr/local/nginx/conf/mime.types;
   # default_type        application/octet-stream;
    include /etc/nginx/conf.d/*.conf;
    access_log      /var/log/nginx/nginx_access.log main;
    error_log       /var/log/nginx/nginx_error.log;
    client_max_body_size 75M;

    server {
        listen 80;
        server_name localhost;
        charset utf-8;
        location / {
            include /usr/local/nginx/conf/uwsgi.conf;
            uwsgi_pass unix:///data/web/hnmall.sock;
            uwsgi_read_timeout 60;

        }
        location /static/ {
            alias /data/web/hnmall/static/;
            autoindex on;
        }
        location /media/ {
            alias /data/web/hnmall/media/;
            autoindex on;
        }

    }
}
12、安装并配置 Redis(不是必须的)
cd /usr/local/
wget http://download.redis.io/releases/redis-4.0.6.tar.gz
tar -zxvf redis-4.0.6.tar.gz
yum install gcc
cd redis-4.0.6
make && make install
将 /usr/local/redis-4.0.6/redis.conf 中的 daemonize no  修改成为 daemonize yes
mkdir /etc/redis
cp /usr/local/redis-4.0.6/redis.conf /etc/redis/6379.conf
cd /usr/local/redis-4.0.6/utils/
vi redis_init_script
# 在第一行加入如下两行注释,保存退出
#  # chkconfig:   2345 90 10
#  # description:  Redis is a persistent key-value database
# 注释的意思是,redis服务必须在运行级2,3,4,5下被启动或关闭,启动的优先级是90,关闭的优先级是10。
cp /usr/local/redis-4.0.6/utils/redis_init_script /etc/init.d/redisd
cd /etc/init.d
# 设置开机启动
chkconfig redisd on
# 到此已经完全设置Redis开机启动了
# 全局启动命令 service redisd start
# 全局停止命令 service redisd stop
13、启动Nginx 和启动项目命令
cd /usr/local/nginx/sbin/
./nginx
cd /usr/local/nginx/sbin/
./nginx -s reload
cd /data/env/website/bin
source activate     # 启动虚拟环境
cd /data/web/website/
kill -9 `pgrep uwsgi` # 杀死uwsgi进程
uwsgi -x website.xml  # 重新启动uwsgi进程
14、在安全组中开放443端口并在阿里云申请https加密,
将申请SSL得到的.pem和.key文件放到 /usr/local/nginx/cert/下(目录自己建但要和配置https中ssl_certificate 和ssl_certificate_key 匹配)
15、 Nginx安装ssl模块
cd /home/nginx-1.15.0
yum -y install openssl openssl-devel
./configure --prefix=/usr/local/nginx --with-http_stub_status_module --with-http_ssl_module
make
cp ./objs/nginx /usr/local/nginx/sbin/nginx_bak
cd /usr/local/nginx/sbin/
./nginx -s reload
16、https 配置 (即重新配置Nginx.conf文件)
cd  /usr/local/nginx/conf/
vim nginx.conf
# 然后将下列内容复制到nginx.conf中文件中去#user  nobody;
worker_processes  2;

events {
    worker_connections  1024;
}


http {
    include       mime.types;
    default_type  application/octet-stream;
    sendfile        on;
    client_max_body_size 20m;
    server {
        listen       443 ssl;
        server_name  域名或IP, 多个时用空格号隔开;
        ssl_certificate      /usr/local/nginx/cert/chengguoyun.pem;
        ssl_certificate_key  /usr/local/nginx/cert/chengguoyun.key;
        ssl_session_timeout  5m;

        ssl_ciphers ECDHE-RSA-AES128-GCM-SHA256:ECDHE:ECDH:AES:HIGH:!NULL:!aNULL:!MD5:!ADH:!RC4;
        ssl_protocols TLSv1 TLSv1.1 TLSv1.2;
        ssl_prefer_server_ciphers  on;

        location / {
            include /usr/local/nginx/conf/uwsgi_params;
            uwsgi_pass 127.0.0.1:8000;
            uwsgi_read_timeout 60;
        }

        location /static/ {
            alias /data/web/website/static/;
            autoindex on;
        }
        location /media/ {
            alias /data/web/website/media/;
            autoindex on;
        }

    }
    # 反向代理到80 端口
    server {
        listen       80;
        server_name 域名或IP, 多个时用空格号隔开;
        rewrite ^(.*)$ https://$host$1 permanent;
    }

}
nginx:[emerg]unknown directive ssl,就是这个错误提示
因为我们配置这个SSL证书需要引用到nginx的中SSL这模块,然而我们一开始编译的Nginx的时候并没有把SSL模块一起编译进去,所以导致这个错误的出现。
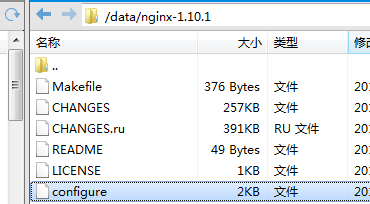
1:我们先来到当初下载nginx的包压缩的解压目录,如果你是看小编写的教程安装的,解压目录应该在“/data/”目录下。

2:来到解压目录下后,按顺序执行一下命令:
cd /data/nginx-1.10.1 //这个命令是进入下载解压的 nginx 文件夹,看你的实际路径

./configure --with-http_ssl_module
重新添加这个ssl模块
注: 执行以上一条命令出现这个错误(./configure:错误:SSL模块需要OpenSSL库。),原因是因为缺少了OpenSSL,那我们再来安装一个即可执行:yum -y install openssl openssl-devel 等待OpenSSL的安装完成后,再执行./configure
3:执行make命令,但是不要执行make install,因为make是用来编译的,而make install是安装,不然你整个nginx会重新覆盖的。
make
4:在我们执行完做命令后,我们可以查看到在nginx解压目录下,objs文件夹中多了一个nginx的文件,这个就是新版本的程序了。首先我们把之前的nginx先备份一下,然后把新的程序复制过去覆盖之前的即可。
cp /usr/local/nginx/sbin/nginx /usr/local/nginx/sbin/nginx.bak //备份,备份则不用执行

cp objs/nginx /usr/local/nginx/sbin/nginx
出现错误,删除掉/usr/local/nginx/sbin/下的 nginx 再复制过去即可
5:最后我们来到Nginx安装目录下,来查看是否有安装ssl模块成功。执行
cd /usr/local/nginx/

./sbin/nginx -v
即可看到如下图:

最后如果出现如上图,则SSL模块添加到Nginx的编译好了
6:第二次配置证书重启的时候,报错
nginx: [emerg] bind() to 0.0.0.0:443 failed (98: Address already in use)
nginx: [emerg] bind() to 0.0.0.0:80 failed (98: Address already in use)
杀掉占用443和80的进程就好了
fuser -k 443/tcp
fuser -k 80/tcp
重新启动则OK了。
17、注意
xadmin没有样式
把 xadmin 里面的 static 下的所有文件拷贝到 项目目录下的 static文件夹下
ueditor富文本编辑框用不了
把 DjangoUeditor 里面的 static 下的所有文件拷贝到 项目目录下的 static文件夹下